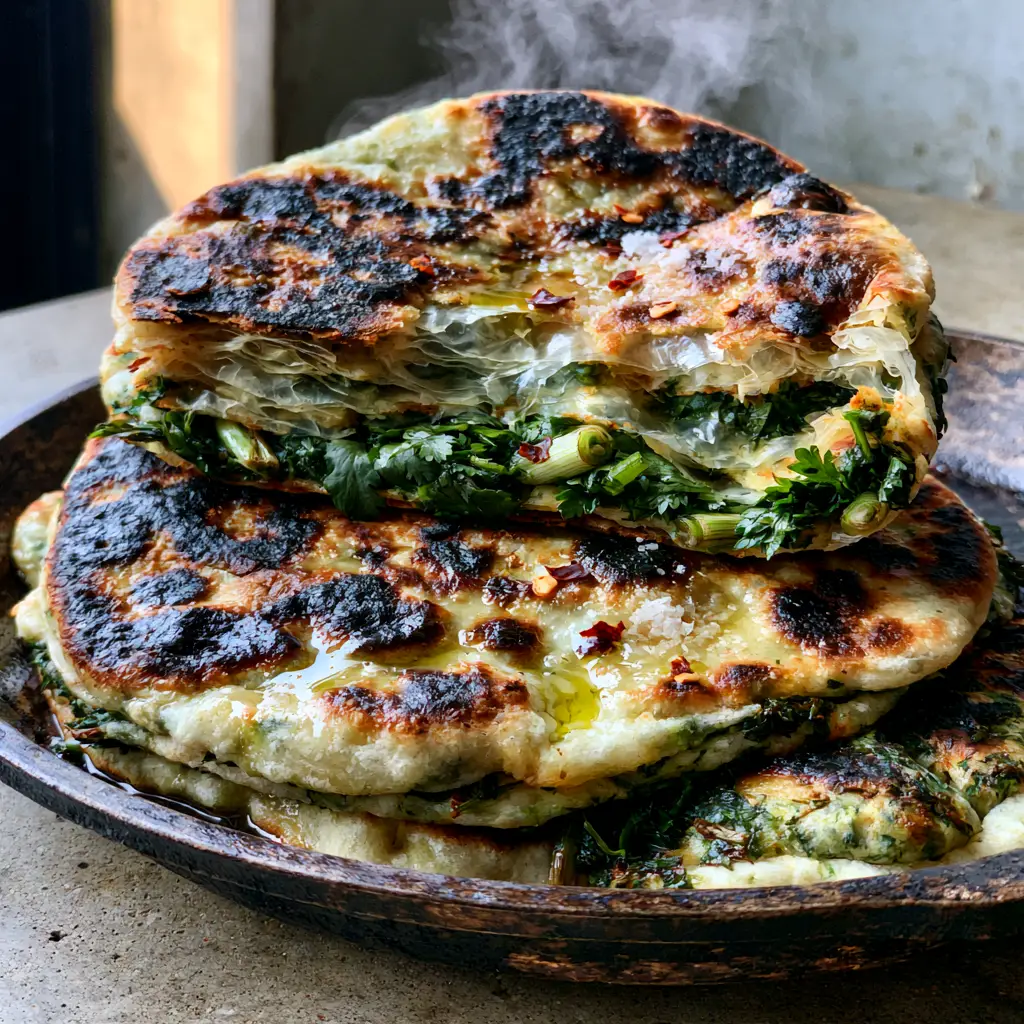
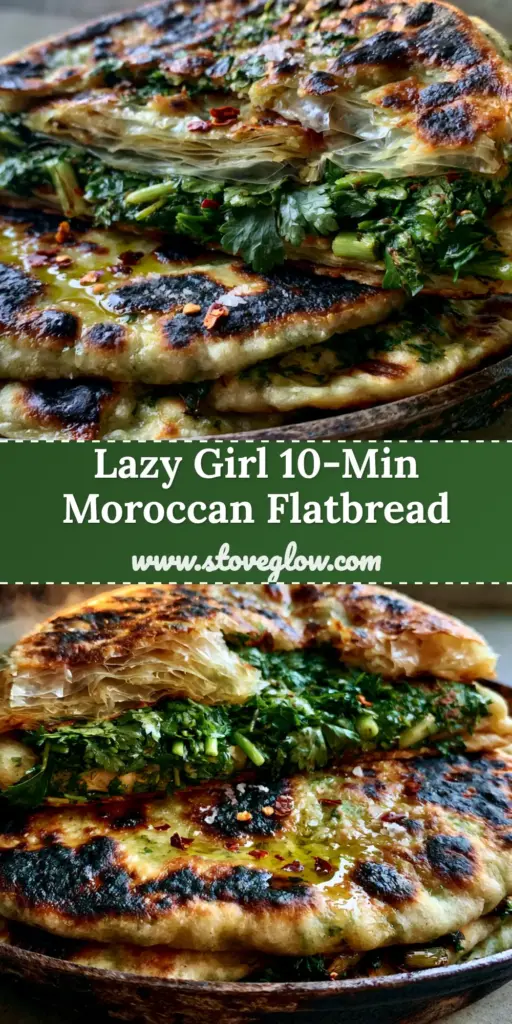
There is a specific kind of magic that happens when a hot cast iron skillet meets cold, laminated dough. The Moroccan herb-stuffed flatbread, known traditionally as a variation of Msemen or Rghaif, is a masterclass in texture and aroma. Imagine tearing into a stack of warm bread to find dozens of paper-thin, translucent flaky layers that shatter slightly before revealing a vibrant, emerald-green stuffing.
This isn’t just bread; it’s a sensory experience. As you pull the golden-brown dough apart, rising steam carries the scent of fresh cilantro, flat-leaf parsley, and sharp green onions directly to your nose. It is the quintessential Moroccan street food, perfected in your own kitchen with the help of high-quality olive oil and a screaming hot pan.
Whether you are serving this as a centerpiece for a weekend brunch or a satisfying side to a hearty stew, this Moroccan herb-stuffed flatbread promises a professional-grade result. We are going to achieve those dark, blistered charred spots and that signature glistening sheen that makes this dish a social media showstopper.
Why You Will Fall in Love with This Herb-Stuffed Masterpiece
- The Lamination: Through a specific folding technique, we create “translucent flaky layers” that provide a satisfying crunch followed by a soft, pillowy interior.
- Vibrant Herb Filling: Unlike dried herbs, our fresh blend of cilantro and parsley creates a “vibrant emerald green” contrast against the golden dough.
- The Skillet Finish: We use high heat to produce “dark, blistered charred spots,” mimicking the traditional clay ovens used in Morocco.
- Artisanal Garnishes: A final dusting of flaky sea salt and red chili flakes adds both a visual pop and a burst of flavor in every bite.
The Secret to a Vibrant Emerald Herb Filling
The soul of the Moroccan herb-stuffed flatbread lies in its stuffing. We aren’t just adding a pinch of herbs; we are creating a dense, flavorful paste that perfumes the dough from the inside out.
Fresh Cilantro (Coriander): 2 cups (60g), finely chopped. This provides the citrusy, bright top notes that define the stuffing’s aroma.
Flat-Leaf Parsley: 1 cup (30g), minced. Parsley adds an earthy, robust backbone to the green filling and maintains its color under high heat.
Green Onions (Scallions): 4-5 medium stalks (50g), thinly sliced. These provide a mild, sweet onion flavor without the moisture content of a bulb onion, which could make the dough soggy.
Red Chili Flakes: 1 tsp (2g). These offer a gentle heat and beautiful red speckles that contrast against the “emerald green” herbs.
Extra Virgin Olive Oil: 1/2 cup (120ml) for stretching and 2 tbsp (30ml) for the filling. This is the “glistening olive oil” seen on the surface, essential for conducting heat and creating those flaky layers.
Foundational Ingredients for the Perfect Flaky Dough
To achieve the “golden-brown flaky dough” described in our blueprint, the structural integrity of the dough is paramount. We need strength to stretch it thin, but enough fat to keep it tender.
All-Purpose Flour: 3 cups (375g). This provides the perfect protein balance for a dough that is elastic enough to become “paper-thin” without tearing.
Fine Semolina: 1/2 cup (80g). A classic Moroccan addition, semolina adds a slight “sandiness” and structural support to the layers, helping them separate during cooking.
Warm Water: 1 1/4 cups (300ml). The temperature is key to relaxing the gluten, making the dough easier to work with by hand.
Fine Sea Salt: 1 tsp (6g). This seasons the dough itself, ensuring the bread isn’t bland against the punchy herb filling.
Baking Powder: 1/2 tsp (2g). This “invisible ingredient” provides a tiny amount of lift, creating the “charred skillet bubbles” that define the bread’s exterior.
Essential Tools for an Authentic Moroccan Result
To recreate the “handheld smartphone photo” aesthetic, you need the right tools to handle the high heat and delicate lamination process. A “dark, rustic cast iron skillet” is not just for show; its heat retention is what creates the blistering.
A heavy-bottomed cast iron skillet is non-negotiable for those “dark, blistered charred spots.” You will also need a large, clean “neutral concrete countertop” or a large wooden board for stretching the dough until it is “translucent.” Finally, a pastry brush will help you achieve that “light sheen of olive oil” that makes the final stack glisten.
Step-by-Step: Mastering the Art of the Fold
Crafting the Elastic Dough Base
In a large bowl, whisk together the flour, semolina, salt, and baking powder. Gradually add the warm water, mixing by hand until a shaggy mass forms. Turn the dough onto your work surface and knead for 8-10 minutes.
You are looking for a specific sensory cue: the dough should feel as soft as an earlobe and bounce back slowly when poked. Divide the dough into 8 equal balls, coat them lightly in olive oil, and let them rest for at least 30 minutes. This rest is vital for achieving those “paper-thin” layers later.
Preparing the Emerald Green Herb Stuffing
While the dough rests, prepare your filling. Finely chop the cilantro and parsley—ensure they are bone-dry before chopping to avoid a watery filling. Mix the herbs with the sliced green onions, a splash of olive oil, and a pinch of salt.
The mixture should look like a vibrant, concentrated herb salad. Set this aside near your stretching station so you can work quickly once the dough is ready.
The Lamination: Stretching to Translucency
Oil your work surface generously. Take one dough ball and flatten it with your palm. Using oiled hands, gently pull the edges outward, working from the center, until the dough is a large, “translucent” square.
You should be able to see the color of the countertop through the dough. Spread a thin layer of the herb mixture across the surface. Fold the top third down to the center, then the bottom third up, and repeat from the sides to create a small, layered square packet.
Achieving the Perfect Skillet Sear
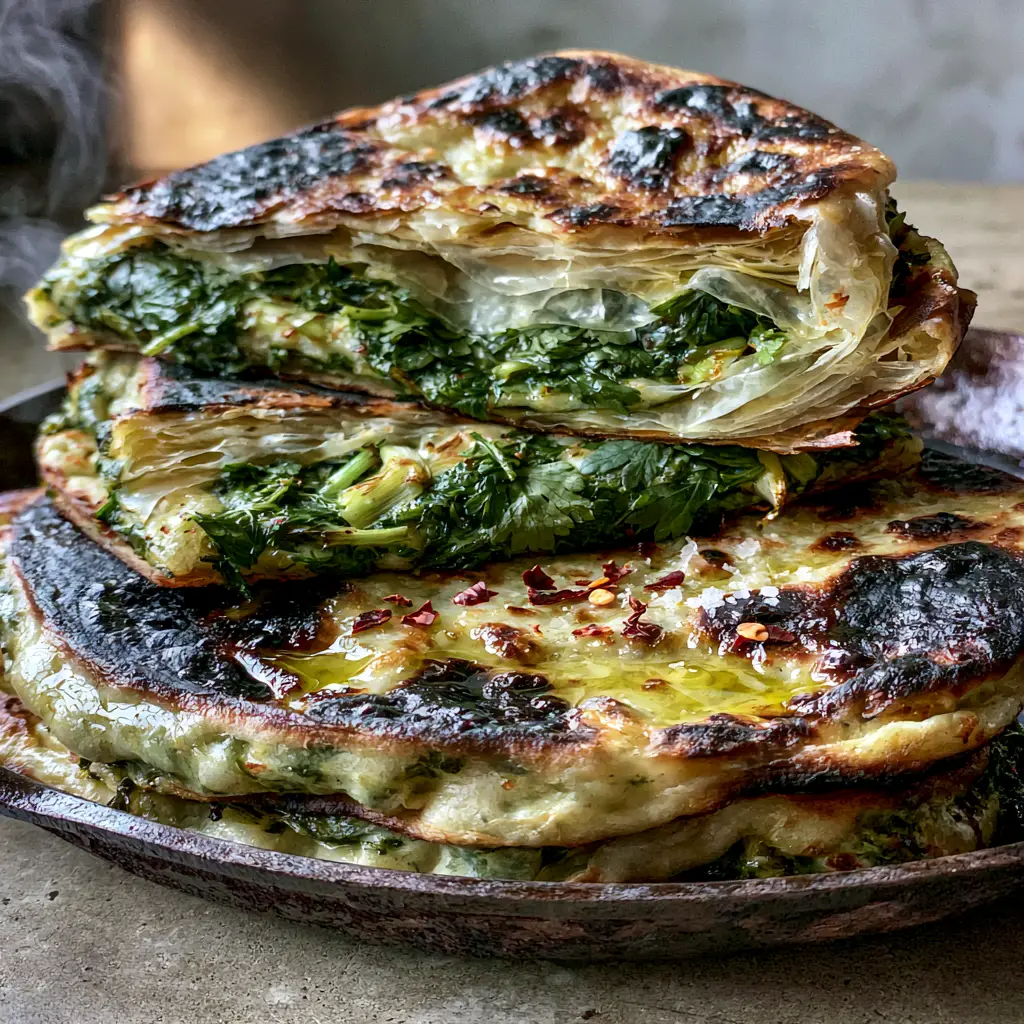
Heat your cast iron skillet over medium-high heat until a drop of water sizzles and evaporates instantly. Lightly oil the pan. Take one folded packet and gently flatten it with your fingers to about 1/2 inch (1.25cm) thick.
Place the flatbread into the hot skillet. Watch for the “rising steam” and the dough starting to puff. Flip every 1-2 minutes. Look for the “dark, blistered charred spots” and “golden-brown” surface. This process usually takes about 5-6 minutes per bread.
Expert Tips for Flatbread Success
- The Windowpane Test: Your dough is ready to rest when you can stretch a small piece thin enough to see light through it without it snapping.
- Keep it Covered: Always keep your dough balls covered with plastic wrap or a damp cloth while working; dry dough will crack and ruin the “translucent flaky layers.”
- Oil is Your Friend: Do not be shy with the olive oil during the stretching phase. It is the barrier that prevents the layers from fusing into one solid block of bread.
- Heat Management: If your bread is browning too fast but the inside feels doughy, drop the heat slightly. The “charred skillet bubbles” should be dark, but the surrounding dough must be cooked through.
Storage, Reheating, and Make-Ahead Advice
This Moroccan herb-stuffed flatbread is best served immediately while the steam is still rising. However, you can store leftovers in an airtight container for up to 3 days in the refrigerator. To reheat, avoid the microwave as it will make the flaky layers chewy.
Instead, place the flatbread back into a dry skillet over medium heat for 2 minutes per side. This restores the “golden-brown flaky dough” texture and the “glistening olive oil” finish. You can also freeze the cooked flatbreads with parchment paper between them for up to 2 months.
What to Serve With Your Moroccan Flatbread
This bread is incredibly versatile. For a complete Moroccan-inspired spread, serve it alongside a zesty mango salad to cut through the richness of the olive oil. The bright acidity of the fruit complements the “emerald green” herb filling perfectly.
If you’re looking for a fusion experience, these flatbreads are excellent for scooping up spicy buldak noodles or serving as a base for crispy smash tacos. For a lighter lunch, a refreshing peach and feta salad provides a sweet and salty contrast that highlights the flaky sea salt on the bread’s crust.
Frequently Asked Questions
It is not recommended. The ’emerald green’ vibrant look and fresh aroma come specifically from the moisture and chlorophyll in fresh cilantro, parsley, and green onions.
While a cast iron skillet is best for creating those ‘dark, blistered charred spots’ due to its heat retention, any heavy-bottomed non-stick or carbon steel pan will work.
Ensure the dough has rested for at least 30-45 minutes. If it resists or tears, let it rest for another 10 minutes. Also, keep your hands and the work surface well-oiled.
The secret is the combination of resting the dough to relax the gluten and using plenty of olive oil while stretching it until it is translucent. This creates the individual layers that separate when they hit the hot skillet.
This usually happens if the dough wasn’t kneaded enough or if the heat on your skillet was too low, causing the bread to dry out before it finished cooking. High heat and proper resting are key.
The Ultimate Moroccan Herb-Stuffed Flatbread Recipe
Moroccan Herb-Stuffed Flatbread: The Ultimate Guide to Flaky, Skillet-Charred Perfection
Ingredients
Equipment
Method
- Mix flour, semolina, salt, baking powder, and water. Knead for 8-10 minutes until elastic and smooth.
- Divide into 8 balls, coat in oil, and rest for 30-45 minutes to relax the gluten.
- Mix chopped cilantro, parsley, and green onions with a splash of olive oil.
- Stretch one dough ball until paper-thin and translucent. Spread the herb filling, then fold into a square packet.
- Flatten the packet slightly and cook in a hot cast iron skillet until golden-brown with dark charred bubbles.
- Brush with olive oil and sprinkle with chili flakes and flaky sea salt while steam is rising.
Notes
Ensure herbs are completely dry before chopping to prevent sogginess.
Bring the Flavors of Marrakech Home
Mastering the Moroccan herb-stuffed flatbread is a rite of passage for any home cook who loves the interplay of texture and fresh aromatics. The contrast between the “dark, blistered charred spots” and the soft, “translucent flaky layers” is something you simply cannot find in store-bought bread. It requires patience and a bit of oil on your hands, but the result is a culinary trophy.
Did you manage to get those perfect skillet bubbles? We want to see your results! Tag your photos on Instagram and be sure to follow KellyTaste on Pinterest for more visual recipe inspirations and artisan bread techniques. Leave a comment below if you experimented with different herb blends!