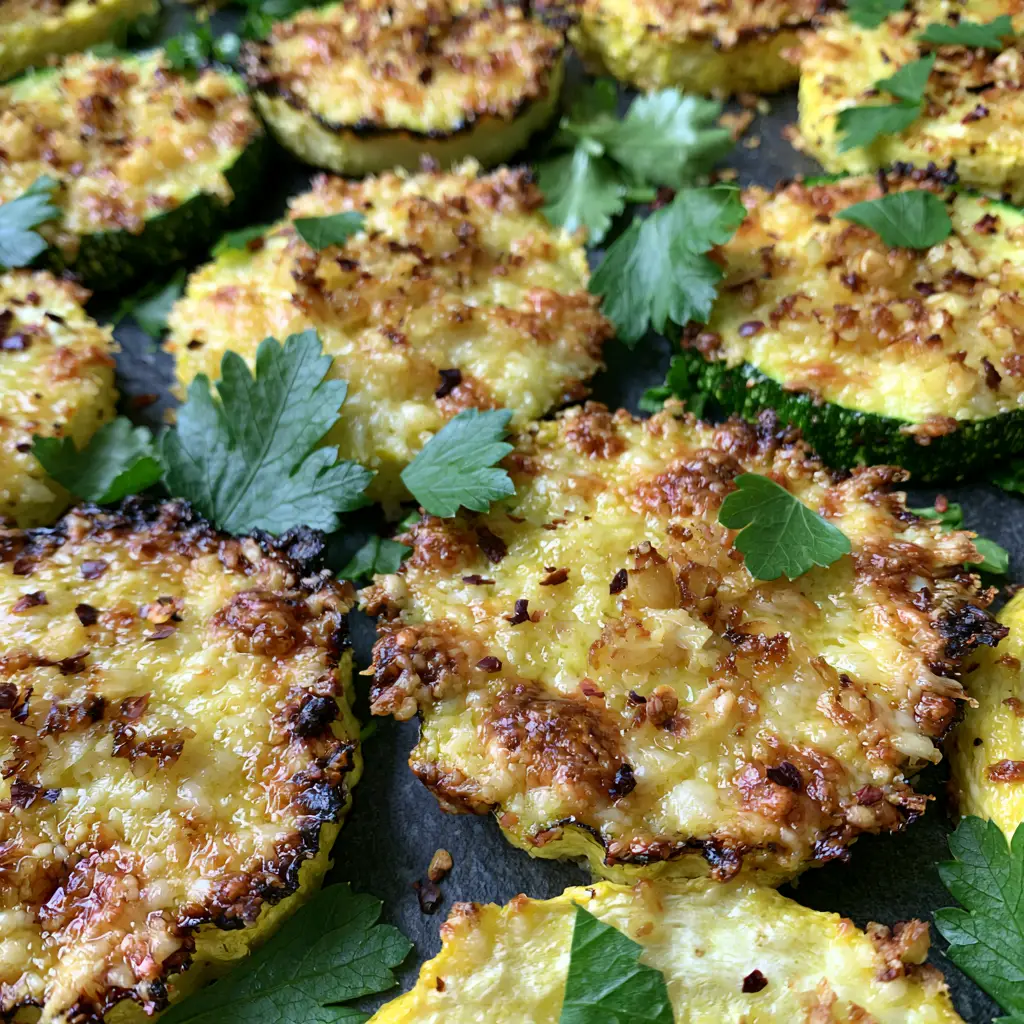
There is a specific visual magic that happens when high-heat roasting meets the humble summer squash. Imagine an extreme close-up, 45-degree angle shot of a dark metal sheet pan, where every single slice of vibrant green zucchini and sun-yellow squash is transformed. This garlic parmesan zucchini and squash medley isn’t just a side dish; it is a masterclass in texture. We are aiming for a thick, uneven, bubbling crust of golden-brown toasted parmesan cheese that clings to every round, punctuated by the deep mahogany bits of caramelized minced garlic.
The secret to the perfect garlic parmesan zucchini and squash medley lies in the elimination of moisture. When you look at the final result, you should see charred, blistered edges and a surface that shows zero moisture—just crispy, savory perfection. Each bite offers a sharp contrast between the tender, creamy interior of the squash and the aggressive crunch of the salt-flecked parmesan crust. Topped with a generous scatter of fresh flat-leaf parsley and a hint of dried red pepper flakes, this dish is as visually stunning as it is delicious.
The Culinary Blueprint: Why This Medley Works
- Zero Sogginess Strategy: By utilizing high-heat roasting on a dark metal pan, we ensure the squash sears rather than steams.
- The Umami Crust: A heavy hand with aged Parmesan creates a bubbling, lacy texture that mimics a gourmet frico.
- Aromatic Depth: Freshly minced garlic caramelizes in the oven, losing its bite and becoming sweet and nutty.
- Visual Contrast: The bright greens and yellows against a dark slate background make this a centerpiece-worthy side.
Essential Components for the Ultimate Squash Roast
Fresh Zucchini Rounds: You will need 2 medium (approx. 450g) zucchini. Select firm, heavy-in-the-hand zucchini with smooth skin to ensure they hold their shape during the high-heat roasting process.
Yellow Summer Squash: 2 medium (approx. 450g) yellow squashes provide a beautiful color contrast. Ensure they are sliced into uniform 1/2-inch (1.25cm) rounds so they cook at the same rate as the zucchini.
Aged Parmesan Cheese: Use 1 cup (90g) of freshly grated Parmesan. Avoid the pre-shredded stuff in tubs; the cellulose coating prevents that uneven, bubbling crust described in our visual blueprint.
Fresh Garlic: 4 cloves (approx. 20g) of garlic, finely minced. The oils in fresh garlic are essential for achieving those caramelized bits that nestle into the cheese crust.
Extra Virgin Olive Oil: 3 tbsp (45ml) of high-quality oil. This is your “invisible” foundational ingredient that facilitates heat transfer and ensures the edges of the squash become charred and blistered.
Fresh Flat-Leaf Parsley: 1/4 cup (15g) coarsely chopped. The large flakes provide a hit of freshness and a vibrant green pop against the golden cheese.
Red Pepper Flakes: 1 tsp (2g) of dried flakes. These provide the “tiny dried red pepper flakes” seen in the visual prompt, adding a subtle heat that cuts through the rich cheese.
Kosher Salt and Cracked Black Pepper: 1 tsp (6g) salt and 1/2 tsp (1g) pepper. Salt is vital for seasoning the squash and encouraging the release of surface moisture before it ever hits the pan.
The Technical Tool Kit for Success
To achieve the “dark metal sheet pan” look and the “charred edges” seen in professional food photography, your equipment choices matter. A dark-colored rimmed baking sheet is preferred here because dark surfaces absorb more heat, leading to better browning on the bottom of the squash.
You will also need a sharp chef’s knife to ensure clean, uniform slices. If your slices vary in thickness, some will turn to mush while others remain raw. A large mixing bowl is required to thoroughly coat every piece in oil and cheese before they are laid out in a single, non-overlapping layer.
Mastering the High-Heat Roast: Step-by-Step Instructions
Phase 1: Prepping for Maximum Crunch
Preheat your oven to 425°F (220°C). While the oven heats, place your dark metal sheet pan inside. Preheating the pan is a professional secret; when the squash hits the hot metal, it begins searing instantly, preventing the “moisture release” that leads to sogginess.
Slice your zucchini and yellow squash into rounds exactly 1/2-inch (1.25cm) thick. Place them in a large bowl and toss with 1 tsp (6g) of kosher salt. Let them sit for 5 minutes, then pat them dry with a paper towel. This step is critical for ensuring the “zero moisture” visual result.
Phase 2: The Garlic and Parmesan Coating
Drizzle the squash rounds with 3 tbsp (45ml) of olive oil and toss to coat. In a separate small bowl, combine the 1 cup (90g) of grated Parmesan and the 4 cloves (20g) of minced garlic. Use your fingers to rub the garlic into the cheese until it is fragrant.
Add the cheese and garlic mixture to the squash. Toss vigorously. The goal is an uneven coating—some areas should have thick clumps of cheese, which will eventually become the “bubbling, golden-brown crust” that is our focal point.
Phase 3: The Roasting Process
Carefully remove the hot sheet pan from the oven. Arrange the squash rounds in a single layer. You should hear a faint sizzle as they touch the pan. Ensure they are not overlapping; airflow is the enemy of steam and the friend of the “blistered edge.”
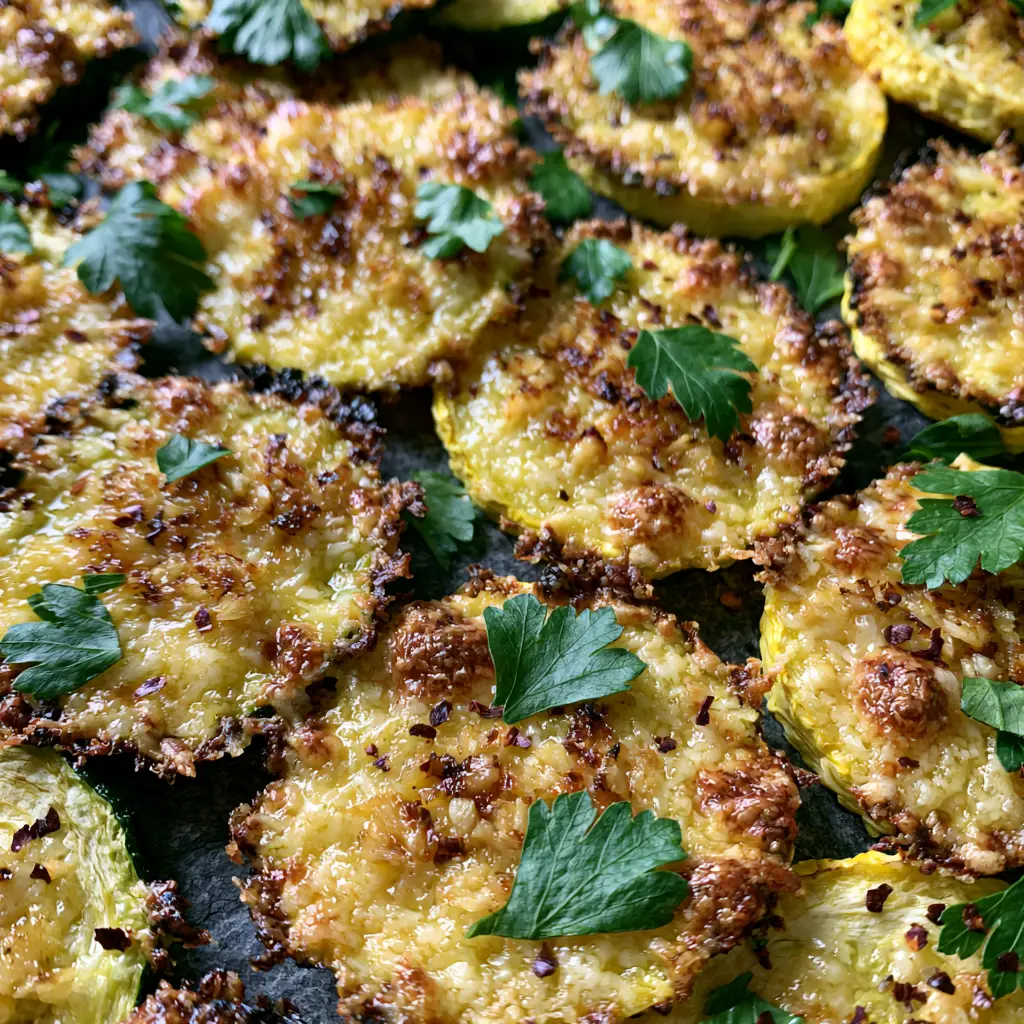
Roast for 15-18 minutes. Around the 12-minute mark, check for sensory cues. You should smell the nutty aroma of toasted cheese and the sweetness of roasted garlic. The cheese should be bubbling and transitioning from a pale yellow to a deep, golden mahogany.
Phase 4: The Final Visual Flourish
Once the edges are charred and the cheese is a crispy crust, remove the pan from the oven. Immediately sprinkle with the 1 tsp (2g) of dried red pepper flakes. The residual heat will wake up the oils in the spice without burning them.
Generously scatter the 1/4 cup (15g) of fresh chopped parsley over the pan. The contrast of the flat-leaf parsley against the “neutral dark slate background” or dark pan is what creates that authentic, handheld smartphone photo aesthetic.
Expert Tips for the Perfect Garlic Parmesan Zucchini and Squash Medley
- Watch the Garlic: Minced garlic can burn quickly at 425°F. Ensure it is mixed thoroughly with the cheese and oil, which protects it from the direct heat and allows it to caramelize rather than carbonize.
- The Grate Matters: Use a microplane for the parmesan if you want a lacy, delicate crust, or a box grater for the “thick, uneven crust” seen in the visual blueprint.
- Avoid Overcrowding: If you have too much squash for one pan, use two. Overcrowding creates a steam pocket, and you will lose those charred, blistered edges.
- Mandolin Safety: If using a mandolin for uniform slices, always use the guard. Consistent thickness is the primary factor in even browning.
Shelf Life and Reheating Realities
While this garlic parmesan zucchini and squash medley is best served immediately to enjoy the maximum crunch of the cheese, you can store leftovers in an airtight container for up to 2 days. Be aware that squash naturally contains a lot of water, and the crust will soften in the fridge.
To reheat, avoid the microwave at all costs. Instead, place the rounds back on a baking sheet and broil for 2-3 minutes until the cheese sizzles again. This will bring back some of that “bubbling” texture, though it will never be quite as crisp as the first roast.
What to Serve With This Golden Medley
This savory side dish is incredibly versatile. Its bold garlic and parmesan profile makes it the perfect companion for grilled proteins or as a textural contrast to softer salads. If you are looking for a complete meal, consider these pairings:
For a light summer lunch, serve this medley alongside a refreshing peach and feta salad. The sweetness of the peaches cuts through the salty parmesan crust perfectly. If you want something with more of a kick, it serves as a cooling yet flavorful side to a bowl of spicy Korean buldak.
If you’re hosting a party, these squash rounds can be served as an appetizer next to savory cheesy italian pinwheels. And for dessert, stay with the fruit theme and try a slice of decadent mango tres leches cake to round out the palate.
Frequently Asked Questions
It is best served fresh from the oven for the crispiest crust. If you must make it ahead, reheat it under the broiler for 2 minutes to restore the sizzle, as the squash will naturally soften as it cools.
For this recipe, freshly grated Parmesan is essential. The pre-shredded or canned versions contain anti-clumping agents like cellulose that prevent the cheese from melting and bubbling into the crust seen in our visual blueprint.
The key is removing surface moisture before roasting. Salt the rounds for 5 minutes, pat them dry with paper towels, and roast at a high temperature (425°F/220°C) on a preheated dark metal sheet pan.
No, leave the skins on. The skin provides structural integrity that keeps the rounds from falling apart under high heat and contributes to the visual contrast of the green and yellow edges.
Dark metal absorbs more radiant heat than light-colored metal or glass. This extra heat is what creates those charred, blistered edges on the bottom of the squash rounds while the cheese crust toasts on top.
The Ultimate Garlic Parmesan Zucchini and Squash Medley Recipe
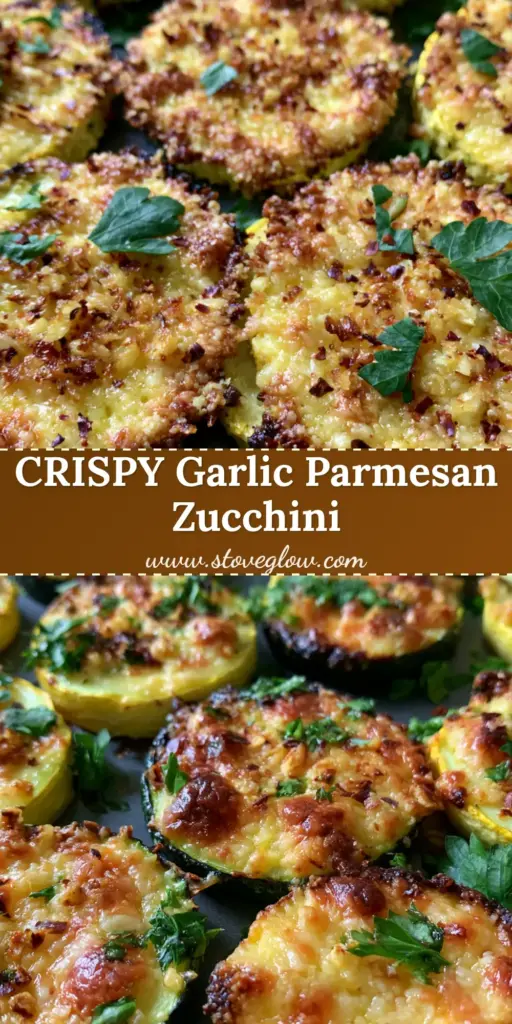
Garlic Parmesan Zucchini and Squash Medley with a Crispy Golden Crust
Ingredients
Equipment
Method
- Preheat oven to 425°F (220°C) and place a dark metal sheet pan inside.
- Toss sliced rounds with salt, let sit 5 mins, then pat dry thoroughly to ensure zero moisture.
- Toss squash with oil, then add the parmesan-garlic mixture, ensuring an uneven, thick coating.
- Spread on hot pan in a single layer. Roast for 15-20 minutes until cheese is golden-brown and bubbling with charred edges.
Notes
Do not overcrowd the pan or the squash will steam.
Bring This Vibrant Side Dish to Your Table
Creating this garlic parmesan zucchini and squash medley is an exercise in simple, high-impact cooking. By focusing on moisture control and high heat, you transform basic vegetables into a “bubbly golden-brown” masterpiece that looks like it stepped out of a professional photoshoot. The combination of caramelized garlic and toasted parmesan is a timeless flavor profile that never fails to impress.
If you enjoyed this recipe, please leave a comment below and let me know how your crust turned out! Don’t forget to share your photos on Pinterest and tag KellyTaste so I can see your beautiful charred edges and golden cheese! Sign up for our newsletter for more visual recipe blueprints delivered straight to your inbox.